
[Ad- gifted product] The year is 2020, I have worked from home for my entire adult life. Working from home means I don’t tend to just nip to the shop on the way home from work, which has shaped my shopping habits. I tend to order items online as well as receive a fair bit of press packages through the post. When it comes to getting packages, I try to recycle as much as I can – putting things within the recycle bin often, but bits of packaging that I can re-purpose or add to the craft box gets put there, in hopes of having another life. Reusing packing is important to me, but so is reducing the amount of packing within these packages to begin with. There are plenty of different places to get plastic free packaging from, which is something I feel both consumers and businesses should switch too, as it is a shame to have to throw away so much harmful plastic which only had one use when it is simply not needed. That’s why I tend to make so many things out of random bits of cardboard or boxes lying around.

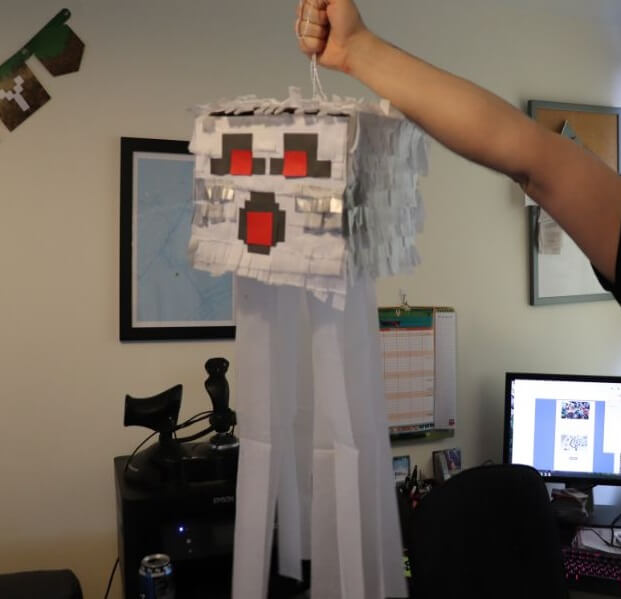
Anyway, I digress. This year, we had a Minecraft themed birthday party in our household, which meant that we needed to have Minecraft themed items! One of the hardest things to find was a pinata that came in some sort of Minecraft theme, so Dann and I decided to make our own. This ghast pinata went down a treat, was destroyed easily, and was very fun to make!
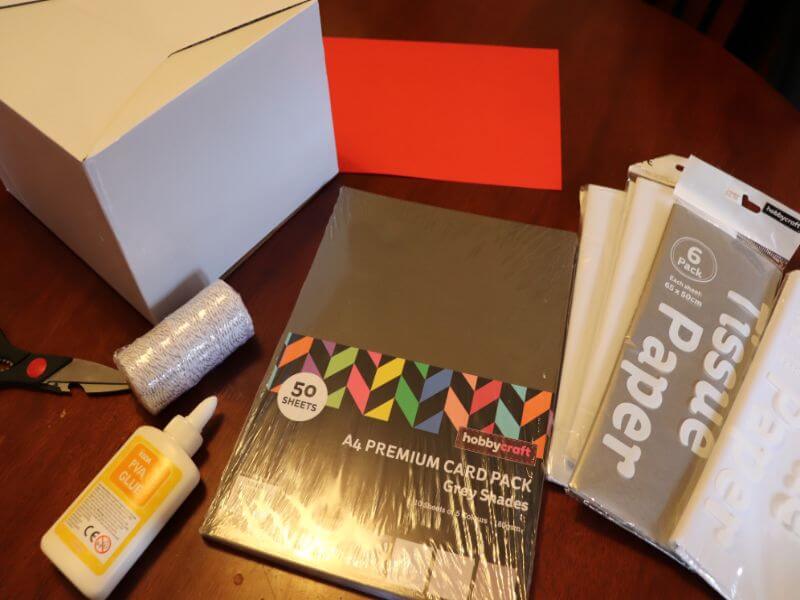
Materials:
- 1 square-ish cardboard box
- Pack of white tissue paper
- 1 Sheet of grey tissue paper
- Glue
- Tape
- String
- 1 Piece of red construction paper
- 1 Piece of dark grey or black construction paper
- Enough sheets of white paper to cover your box if it is not white.
The first thing I did was cover any sort of advertisements or pictures on my box with white paper. I already had a white box, but it had a picture of a helmet on the side, and it’s important to cover these up as the tissue paper does show what’s beneath it. Using a good quality digital fine art paper can really help! I then filled my box with treats as I feel that you do not need to just fill it at the end, like a store bought pinata. Once filled, I carved a small hole into the top for the string. I then tied the string around some extra cardboard and placed it inside, pushing the string through the hole in the top of the ghast pinata. Next, I tapped down the top with only one or two pieces of tape (this thing still needs to be breakable!)
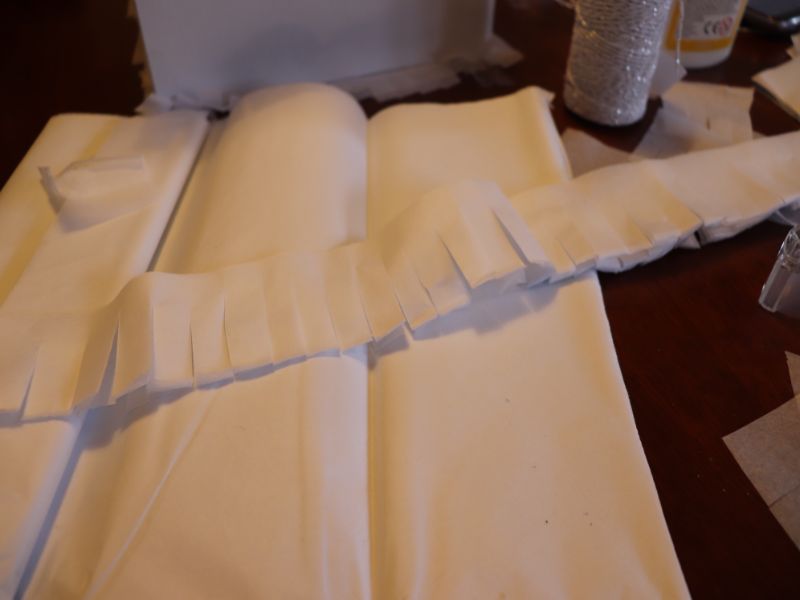
Now, we needed to start decorating, so I started cutting the tissue paper into thick strips and cutting slits up one side, almost all the way through, a few inches apart. Once the tissue paper is cut, I put some glue on the side of the box that I wanted to place the tissue paper onto and started adding the tissue paper one piece at a time. Do not cut all of your tissue paper at once, as you might need less depending on how far you place each one. They don’t need to be right on top of each other and can be a bit spaced out. After reaching about half way, I started from the edge and continued in from the other side until meeting in the middle. This is so that each side has bits hanging off of it.
You will need to repeat this on each side, but I left the back blank because I was getting a bit tired and didn’t feel the need to do the back. After all of the tissue paper is on, it’s time for the smaller details. With the single sheet of grey tissue paper, I made the same strip cut and cuts across the bottom and used them for the sides of the ghast’s face, to match the grey markings it has in Minecraft. Then I eyeballed cutting squares and rectangles out of the grey paper and gluing them on while looking at a reference picture of a ghast. Once they were down, I added the red squares that would be their eyes. There is only one detail to add to the ghast pinata, and that’s long strips that act like legs hanging from the bottom. I used tape on both sides of the strip to tape them down.
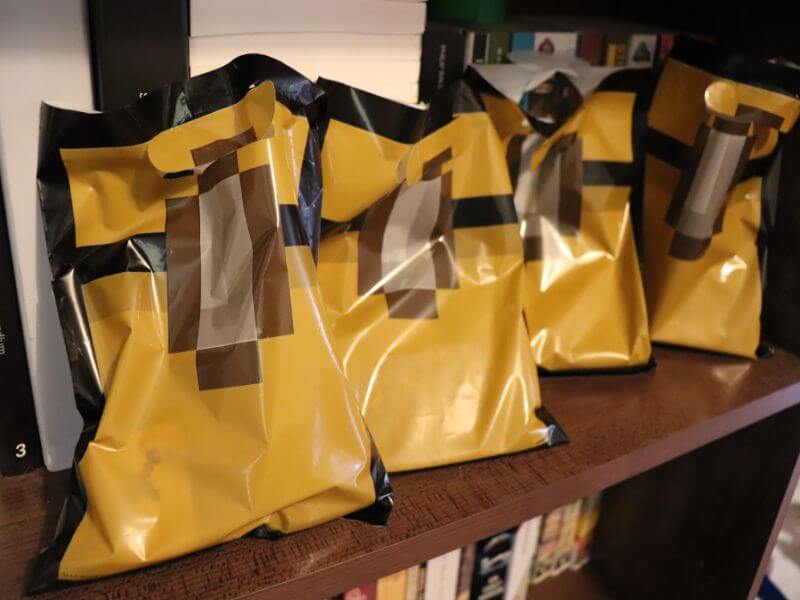
Then, you’re done! Your ghast pinata will be completed. Homemade pinatas, for me, are always a bit uneven but shaking around the filling can make them sit correctly when in the air. We smashed it open after quite a few hits with a pinata stick. It was a good and spooky time. We also had a bunch of creeper balloons, hanging decorations, Minecraft character masks, gift bags and much more to complete our party.


Previously, we made a Minecraft Crafting Table dresser as well as a bunch of other DIY projects.
We never make these in my culture and country. I’ve never seen one. Guess that means that I must be the one to make it.
That’s interesting – I guess I always assumed everyone had pinatas!
I love this. It’s so creative and looks great!
The cake looks amazing too 🙂
Thank you, we worked so hard on it all!
Great idea! This looks like such a fun thing to do.
Antonia || Sweet Passions
It was pretty fun! Also great to destroy.
This is absolute genius! Firstly, pinatas are such a lot of fun at parties, and secondly because I don’t know a single 10 year old who isn’t into Minecraft. My daughter would LOVE this, thank you so much for the step by step! 🙂
Lisa | http://www.lisasnotebook.com
Minecraft is so popular with everyone – as are pinatas!
What a fun little project! It looks great!
Thank you!