
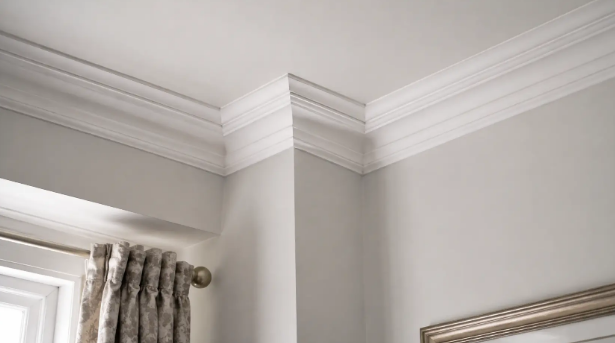
Think about how much attention the average room gets. The walls are painted and probably repainted every few years. The floor is chosen carefully and cleaned constantly. The furniture is agonised over.
And then there’s the ceiling, which in most modern houses is a flat white rectangle that meets the walls at a hard right angle and does absolutely nothing. It’s roughly a sixth of the visible surface of the room and it’s the one part nobody has a plan for. Which is a shame, because it’s also the cheapest surface to change dramatically — a length of coving, a ceiling rose, a bit of panelling, and a room reads completely differently. Once you start looking at what decorative mouldings can do, the flat white rectangle starts to look like a missed opportunity.
Here’s what’s worth knowing before you order anything.
Why coving does more than it looks like it should
Coving — the moulding that runs where the wall meets the ceiling — solves a problem most people have never consciously noticed.
A hard 90-degree junction between two flat planes is visually abrupt. Your eye stops there. Add a curve or a stepped profile and the eye travels round the corner instead, which makes the transition feel softer and, oddly, makes the ceiling feel a touch higher rather than lower.
It also hides a multitude of sins. The wall-ceiling junction is where you get hairline cracks from normal building movement, where wallpaper edges never quite line up, and where a paint line is hardest to cut in neatly. Coving covers all of it.
In older houses it’s usually already there. In houses built from roughly the 1960s onward it very often isn’t, and adding it is one of the few changes that makes a modern room feel more considered without making it look like a pastiche of something older.
Getting the size right
This is where most people go wrong, and the error runs in one direction: they choose something too small.
The instinct in an average-height room is to pick the narrowest profile available so it doesn’t “eat” the ceiling. In practice a very small coving tends to look like a strip of something rather than an architectural feature, and the room ends up looking as though someone tried and gave up.
As a rough guide, standard modern ceiling heights suit a coving in the mid range rather than the smallest available, and a taller room can carry something considerably deeper. The most reliable approach is not to guess: order sample lengths, hold them up against the actual wall in the actual light, and look at them from where you normally sit rather than from a stepladder.
Proportion also depends on what else is in the room. A deep coving above a room with very slim skirting boards looks top-heavy. The two are usually chosen together.
The material question
Three broad options, and the differences matter more than the price list suggests.
Plaster is the traditional choice, gives the crispest detail, and is heavy. It needs proper fixing and is genuinely a job for someone who has done it before.
Polyurethane and similar composites are light, easy to cut, easy to fix with adhesive, and take paint well. Detail is slightly less crisp than plaster on close inspection, though from floor level in normal light the difference is very hard to see. This is what most DIY installations use, and reasonably so.
MDF is cheap and fine for simple profiles, but it doesn’t like moisture, which rules it out for bathrooms and makes it a slight risk in kitchens.
There’s also flexible coving, which is worth knowing about specifically because it will follow a curved wall or a bay window. If you have a curve in the room, this is the thing that solves it, and people usually don’t discover it exists until after they’ve struggled.
The corners are the whole job
Here is the honest bit. Running coving along a straight wall is easy. Anyone can do it.
The corners are what separate a good job from an obviously amateur one, and they are harder than they look, because a coving corner is not a simple 45-degree cut. The moulding sits at an angle to both the wall and the ceiling, so cutting it flat in a mitre box the way you’d cut skirting produces a joint that doesn’t meet.
There are two standard approaches — cutting it in the mitre box at the same angle it will sit on the wall, or using a compound mitre saw set to the correct pair of angles for the profile. Both work. Both require a couple of practice cuts on offcuts before you touch the piece that’s actually going up.
And internal corners are more forgiving than external ones. If your room has external corners — around a chimney breast, for instance — do those first while you still have plenty of material, and buy about ten per cent more than you calculate you need.
Ceiling roses, and when they work
A ceiling rose is the circular moulding around a light fitting, and it’s the other classic ceiling detail.
The rule of thumb is that it should relate to the size of the room and the fitting rather than being as large as possible. A rose that’s too big in a small room looks like a hat. Too small and it reads as a mistake.
They work best with a pendant fitting that has some visual weight to it. Under a flush ceiling light they can look slightly orphaned, because there’s nothing hanging to justify the circle.
What it costs you, realistically
The materials are among the cheapest things you can buy per metre of visible impact. The real cost is time, and specifically the time spent on corners and on filling and caulking the joints afterwards so everything reads as one continuous piece rather than lengths stuck together.
That last stage is the one people skip, and it’s the difference between coving that looks original to the house and coving that looks added. Fill every joint, caulk both edges, sand, then paint the coving and the ceiling in the same finish so the eye reads them as one surface.
Do that, and a room that cost you a weekend looks like it was always meant to be that way.